
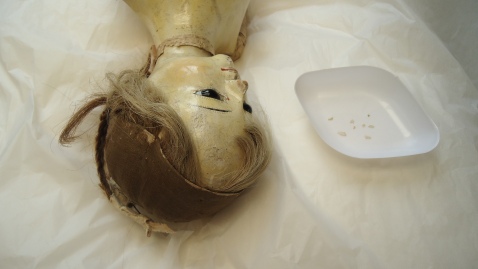
After documenting the fashion doll [TOY.301], then washing and conserving the underwear, the body itself required attention. The doll’s body is carved from wood, with a layer of gesso, beneath the paint and varnish. From the date of the object, we can conject that the varnish is a natural resin, which has oxidised on the exposed face and upper chest, but not beneath the clothes. The paint is presumed to be oil-based lead white, with the red lips, and corners of the eyes applied above the varnish. Samples of the paint and varnish could be analysed to determine exact materials, but the facilities to do so are not available at the Bowes Museum.

The painted surface was soiled, with areas of damage including loss of paint, and of gesso, with areas of exposed wood (particularly on the nose). The doll had clearly been bashed around, with several bumps to the forehead, and shattering of the varnish and paint layers. The paint was actively flaking under the eye, on the chin, and in various areas on the body. There were also a few loose flakes retrieved from the base of the storage box, and rescued from within her hair, none of which were larger than 2mm in diameter.
Due to the fragility of the paint surfaces in the damaged areas, the paint was consolidated first, then cleaned later. First, the loose flakes were re-attached, using fine watchmaker’s tweezers to pick up, rotate, and lay down the flakes. After a dry run, to work out the location of the pieces, a conservation adhesive was used to attach them, with a fine sable brush to deliver the adhesive.

The very thin adhesive is sucked into the cracks, and beneath the paint layer, by capillary action, firmly securing the flakes in place, and consolidating the surrounding paint and gesso. I used Lascaux Medium for Consolidation, an adhesive which has good ageing properties, a good bond strength, and low surface tension, enabling it to penetrate below the surface layer.


The doll was positioned on a beanbag cushion, with the working surface flat, to allow gravity to help. A silicone paintbrush was used to gently press down on the flakes, to apply a little pressure (doing so with the tweezers would cause the paint flakes to fracture). The doll was left to dry thoroughly, before each of the other damaged areas was worked on in turn. Any areas of flaking paint (where the flakes were likely to come loose) were treated in the same manner.

Some paint flakes could not be re-attached. They will be saved, kept with the records, and may be useful in the future, for analysis of the materials.

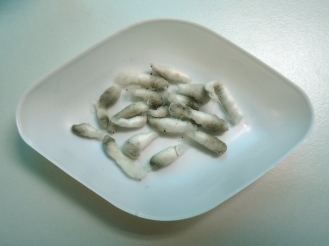
With the painted surface stable, it could be cleaned. Following testing to determine that it was a safe choice, and would not harm the varnish or paint layers, the surface was gently swab cleaned using de-ionised water. This lifted ingrained soiling from dust and dirty hands from the face, neck and bust. The lower half of the body was un-varnished, so was not swabbed. The improvements in the appearance of the doll were immediate, and the dirty swabs attest to this.

In my next blog post, I’ll cover the conservation of the green quilted silk petticoat, and the tiny shoes! Then the doll is ready to put her clothes back on.
Katy Smith, Textiles Conservator

I work in a National Museum in Charlottetown PEI as a docent and love to read your blog.
LikeLike
Glad you’re enjoying it!
LikeLike
I always enjoy reading the details of your work – very interesting!
LikeLike
Thank you! Glad you are enjoying the blog posts!
LikeLike
I worked on re-housing this collection in the mid 1980’s. Following your progress with interest.
LikeLike