
In recent months I have been strengthening my structural conservation skills in the studio working on two paintings with torn supports, both requiring different materials and approaches to treatment. The first, a mid-19th century oil on canvas with a complex tear by Fleury [BM 505], presented an interesting challenge.
An accidental impact from the front had occurred while on loan a number of years ago causing a large tear in the centre of the painting. The brittle aged canvas meant that the impact had caused a relatively neat break along the canvas threads with little distortion and which suggested the threads could be butt joined together with adhesive. However, despite the use of gum tape sutures added previously to temporarily hold the tear together and prevent further damage occurring, left untreated for a prolonged period, the torn sections had begun to ‘belly-out’ or sag due to the weight of the untensioned support in that area.


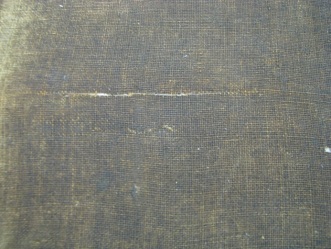
Tears on traditional paintings are generally treated from the back of the canvas to ensure a discreet mend that isn’t visible on the front. On closer assessment of this tear however, despite the painted edges aligning neatly at some points, there was also a small amount of overlap in other areas that would need to be addressed before joining the tear, which suggested treatment from the front and back of the canvas would be necessary.
I prepared the edges of the tear before joining by trimming back any extended lengths of threads that could not be butt joined and then used dental tools to carefully push any exposed threads to the back of the tear to be mended from the reverse at a later stage. While face up, any fragile flaking paint along the edges of the tear was also consolidated to prevent further paint loss, using isinglass, a natural water-soluble adhesive.

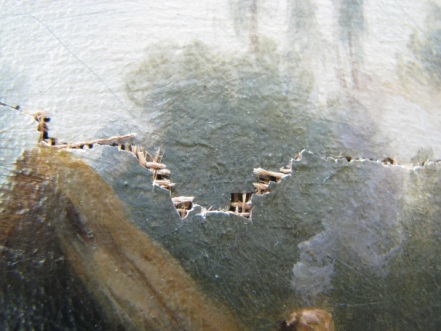

With the painting face-up and supported by the jiffy foam blocks, I started treatment at the centre of the tear where I could identify paint edges that could be fitted together neatly like a jigsaw and I reconnected the broken canvas threads either side of this area (only where paint loss made the threads visible and accessible). Acid-free gum tape was used like sutures to temporarily hold the newly aligned paint sections together while nearby threads that were visible due to paint loss were joined with adhesive.
The adhesive chosen was polyamide welding powder an inert synthetic consolidant which melts on application of heat (I used a heated tip for precision) and dries to a flexible film. The flexibility of the adhesive was an important property, as I wanted to be able to manipulate the mend during treatment.

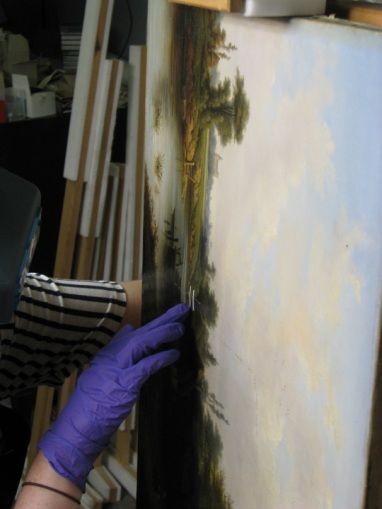
As the treatment progressed I realised that to treat this tricky tear I needed to be able to view the front and access the back of the painting at the same time, so I decided to treat the painting vertically on the easel. This allowed me to easily access the back of the canvas while viewing the front at the same time in order to manipulate the threads and properly align sections of paint with my fingers before fixing them in position with the adhesive.
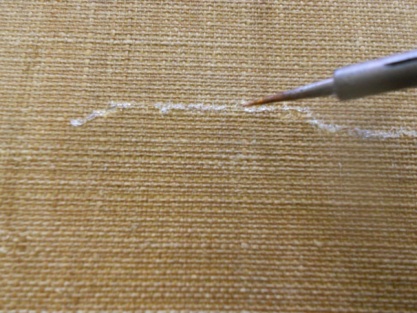
Once the tear was correctly aligned from the front, I could safely continue the tear mend from the back of the canvas, face-down on the bench, joining the broken threads using the melted polyamide powder on a heated tip. The treated area was then sealed using a heated spatula over silicon release paper.
Successive moisture treatments on the back of the tear using damp blotter and drying under weights were carried out to flatten any distortion in the threads and bring them back into plane and tension. With the canvas face down on the bench, any remaining overlap along the tear was gently manipulated by hand while the area was still humidified and flexible.
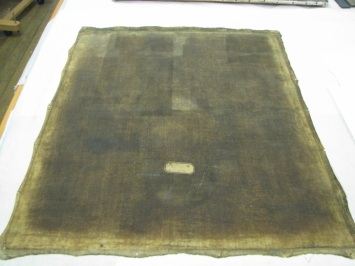
The tear mend stage of treatment is completed but the areas of paint loss along the tear will need to be filled and retouched for the join to be invisible from the front. Despite managing to flatten the tear through moisture treatments, it seems that more interventive measures will be necessary for the next stage of treatment (such as removing the painting from the strainer and adding a strip lining). These measures should hopefully provide the painting with enough tension to counteract the ‘memory’ in the canvas, which once relaxed, causes the join to once again curl inwards and become visible.

Encouraged by my experience, I was keen to continue my tear mending practice by working on another painting in the studio, this time requiring a more straightforward mend.
An 18th century painting by an unknown artist (o.310) known as ‘Portrait of a Lady’ was found in very poor condition with severe buckling across the canvas which was only partially attached to its broken strainer. Last year Jon Old (Conservation Manager) and the previous intern Paul carried out essential conservation treatment to stabilise the painting by removing the buckled and torn canvas from the damaged strainer, protecting loose paint layers with facing paper and then humidifying and flattening the support under boards to remove the numerous distortions. By the time I started work on the painting, it was flat and ready for the next stage of treatment.

As the large tear was positioned on the bottom right corner (the canvas corners typically experience a lot of stress under tension) the mend would need to withstand the tension applied to it when the canvas is re-stretched at a later stage of treatment. For that reason I chose to use an epoxy adhesive which dries to form a very strong bond.
Because the epoxy is a 2 part adhesive system of resin and hardener which sets very quickly there is little room for error so it was necessary to prepare the tear for treatment by scraping dirt from the canvas with a scalpel and correctly aligning and trimming back any broken threads which would then be butt jointed with the adhesive.
The area was then humidified to impart flexibility to the threads, while clips with small bag weights tied with lengths of string were attached to the edges of the canvas to pull apart a slight overlap along the tear. Once sufficiently aligned, the area was left to dry under dry blotter and boards to hold the position of the tear before mending.

As I had no previous experience joining a tear of using epoxy adhesive, I carried out tests joining a split on small samples of a oil painting until I felt confident with my technique (the sample was donated by Jon and not part of the collection I hasten to add!).
Using a dental tool, a thin string of the epoxy resin was drawn across the tear before being gently heated with a spatula to infuse the adhesive into the threads and then held under boards to flatten.


Currently I am flattening the many small distortions present over the canvas in preparation for the next stage of treatment…lining, more of which in another post.

Pauline Murray, ICON/HLF Paintings Conservation Intern


So interesting, and your photodocumentation is excellent! This must be very satisfying work. Well done.
And I enjoyed seeing flatirons put to good use 🙂
LikeLike
Thanks for your kind comments, I’ve been very lucky in having some brilliant projects to work on!
LikeLiked by 1 person
Pauline, incredible work. Beautifully mended tears and excellent documentation. I read your whole post and then was delighted to see your name at the end. Nice work, my friend.
LikeLike